How to Use a NOCO Genius5 Battery Charger
Connect the charger to the battery first, plug it into the wall, then select 6V or 12V and your battery chemistry. The GENIUS5 handles the charge curve on its own and can stay connected indefinitely for maintenance.
On this page (9 sections)
- What do you need before charging a battery?
- How do you connect the charger to the battery?
- Which mode should you select for your battery?
- How does Force Mode work on a dead battery?
- What do the indicator lights mean while charging?
- How long should you leave the charger connected?
- How do you mount and store the charger?
- Which batteries and vehicles does the GENIUS5 suit?
- How do you use the NOCO Genius5 charger safely?
Here's how to use a NOCO Genius5 battery charger: clamp it to the battery posts or connect the eyelet leads, plug it in, then press the mode button to choose 6V or 12V and your battery type. The charger takes over from there, so you don't have to manage the amps yourself.
The GENIUS5 is a 5 amp smart charger, maintainer, trickle charger and desulfator in one case. It handles 6V and 12V lead-acid and lithium batteries up to 120 amp-hours.
This guide walks through the connection order, the mode buttons, what the lights mean, and how to leave it hooked up for storage.
What do you need before charging a battery?
You need the charger, a grounded 120V outlet and a battery you can reach safely. The GENIUS5 box includes the 5A charger, a 72-inch AC cable, an 80-inch DC cable with clamps and integrated eyelet terminals, a mounting bracket, screws and a user guide.
Work in a ventilated space, away from sparks and open flame. Lead-acid batteries can give off hydrogen gas while charging.
Keep the charger dry and off the floor where it could sit in water.
Check the battery case for cracks or leaks before you start. A swollen or frozen battery should not be charged.
If the terminals are crusty, clean them first so the clamps make solid contact.
Mounting the charger on a wall or shelf keeps the cables tidy. The bracket and screws let you fix it near the vehicle so the eyelet leads can stay attached to the battery.
How do you connect the charger to the battery?
Connect the DC leads to the battery before you plug the charger into the wall. That order keeps sparks away from the battery and lets the charger read the battery as soon as it powers up.
With the clamps, attach the positive (red) clamp to the positive post and the negative (black) clamp to the negative post. Rock each clamp slightly to bite into the metal.
If your vehicle has multiple batteries, charge one at a time unless the maker says otherwise.
The integrated eyelet terminals are the better option for a battery you charge often. Bolt the ring terminal to each post and leave the connector hanging in reach.
Then you just plug the connector into the charger's cable each time.
Don't reverse the clamps. The GENIUS5 has reverse-polarity protection, but the correct order still matters for a clean connection.
Keep the clamps from touching each other when they are off the battery.
Which mode should you select for your battery?
Press the mode button until the light matches your battery's voltage and chemistry. The GENIUS5 covers 6V and 12V lead-acid types and 6V and 12V lithium-ion (LiFePO4).
The modes are 6V, 12V standard, 12V AGM, 12V lithium and a repair or force setting. On a 12V car battery, 12V standard or AGM is the usual pick.
Check the battery label or the vehicle manual when you are unsure.
Select 6V for older motorcycle, garden tractor and golf cart batteries that run on 6 volts. Choosing the wrong voltage can leave a battery undercharged or push too much into it.
The GENIUS5 remembers the last mode you used. Confirm the light matches the battery in front of you rather than assuming it carried over from the last job.
How does Force Mode work on a dead battery?
Force Mode lets you charge a battery that reads below 1 volt, down to zero. The charger normally won't start on a battery it can't detect, so this is the override for a deeply drained or neglected battery.
Hold the mode button for about 5 seconds until the Force Mode light comes on. Then let the charger run and watch the battery.
A battery that has sat dead for months may recover, or it may be too far gone.
Don't use Force Mode on a battery with a known defect or one that won't hold a charge after a normal cycle. Charging a shorted battery can cause heat and damage.
Stop if the case gets hot or you smell something burning.
For a battery that only dropped low from a long park, Force Mode plus the desulfation cycle is often enough to bring it back. Recheck the voltage after the charge finishes.
What do the indicator lights mean while charging?
The mode light stays on to show your selection, and a separate charge light shows progress. A pulsing light means the charger is still working; a steady light means the charge is complete and the unit has moved to maintenance.
If the charge light flashes an error pattern, the charger has detected a problem. Common causes are reversed clamps, a battery below the detection threshold or a battery that won't accept a charge.
Recheck the connections first.
The GENIUS5 also has an integrated thermal sensor. It adjusts the charge based on the surrounding temperature, so it slows down in hot weather and pushes a little more in the cold.
That protects against overcharging in summer and undercharging in winter.
You don't need to stand over it. Start the charge, confirm the lights are right, and come back later.
Our NOCO GEN5X2 review covers the two-bank version if you maintain more than one battery.
How long should you leave the charger connected?
NOCO rates the GENIUS5 at up to 8 hours for a typical charge, but the real time depends on how drained the battery is. A battery at 12.2 volts finishes faster than one rescued from 1 volt.
For maintenance, you can leave the charger connected indefinitely. It monitors the battery and tops it up as needed without overcharging.
That makes it a good fit for a boat, camper or classic car that sits for weeks.
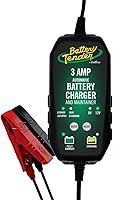
If you're deciding between brands for a long-term maintainer, our Schumacher vs Battery Tender comparison weighs the two main alternatives. The Battery Tender 3 amp review covers a smaller option for motorcycles and small batteries.
Disconnect the AC plug first when you're done, then remove the clamps in reverse order. With eyelets, just unplug the connector and leave the leads on the battery.
How do you mount and store the charger?
Use the included bracket and screws to fix the charger on a wall or shelf near the battery. The bracket with its Velcro strap holds the unit so the cables reach without strain.
Mount it where the charger stays dry and the cables won't be walked on. Keep the AC cable away from the battery and route it so it doesn't cross a walkway.
Don't coil the cables tightly while the charger is running.
For seasonal storage, unplug the AC side and wipe the charger clean. Store it indoors in a dry spot.
Leave the eyelet leads on the battery if the vehicle stays parked, or remove them and cap the posts.
The GENIUS5 measures 3.43 by 4.61 by 7.95 inches and weighs 1.6 pounds. It's small enough to sit on a shelf or tuck beside a motorcycle battery box.
Which batteries and vehicles does the GENIUS5 suit?
It suits 6V and 12V batteries up to 120 amp-hours across cars, motorcycles, ATVs, lawn mowers, boats and RVs. That range covers most maintenance jobs a home garage handles.
For a big dual-battery truck or a large boat bank, 5 amps takes longer. A 10 amp battery charger moves more current and finishes bigger batteries faster.
The charger's desulfation cycle helps restore batteries that sat flat for a long time. It uses pulse charging to break down sulfation and stir up acid stratification.
A neglected battery has a better chance after a repair cycle.
It's also a practical pick for lithium batteries in trolling motors, golf carts and camper solar setups. Pick the lithium mode so the charge curve matches the chemistry.
How do you use the NOCO Genius5 charger safely?
Using the NOCO Genius5 battery charger safely comes down to a few rules: connect to the battery before the wall, choose the right mode, and keep sparks and water away. Ventilate the space and never charge a frozen or damaged battery.
Let the charger finish and switch to maintenance on its own. Unplug the AC side first when you disconnect.
With those habits, the GENIUS5 is a set-and-forget maintainer for a stored vehicle and a capable recovery charger for a battery that went flat.
For a bigger multi-battery setup, compare the dual-bank option in our NOCO GEN5X2 review. For a smaller battery or a motorcycle, the Battery Tender 3 amp review covers the low-amp alternative.
Frequently asked questions
Can I leave the NOCO GENIUS5 connected all the time?
Yes. The GENIUS5 switches to maintenance and monitors the battery, so NOCO says you can leave it connected indefinitely without overcharging.
Use the eyelet terminals for a permanent connection and unplug the AC side when you store the charger.
What is Force Mode on the GENIUS5?
Force Mode is a manual override for batteries that read below 1 volt, down to zero. Hold the mode button for about 5 seconds to activate it.
Only use it on a battery you believe is recoverable, and watch the charge closely.
Does the GENIUS5 charge lithium batteries?
Yes. It supports 6V and 12V lithium-ion (LiFePO4) batteries as well as lead-acid types like AGM, gel, flooded and deep-cycle.
Pick the lithium mode before you start so the charger uses the right charge profile.
How long does the GENIUS5 take to charge a battery?
NOCO rates the GENIUS5 at up to 8 hours for a typical charge, but the real time depends on battery size and how deeply it was drained. A battery at 1 volt needs far longer than one at 12.2 volts.
Let the charger finish on its own.
What size battery can the GENIUS5 maintain?
The GENIUS5 is designed for batteries up to 120 amp-hours. That covers most car, motorcycle, ATV and boat batteries.
Larger banks call for a bigger charger, such as a 10 amp model.